Step by Step: Installing Minecraft on a Chromebook
Minecraft's immense popularity spans nearly every device, and Chromebooks are no exception. Running on Chrome OS, these handy devices present a unique challenge for Minecraft players. But the question, "Can I play Minecraft on my Chromebook?" has a resounding yes! This guide walks you through the installation process and offers performance-boosting tips.
Table of Contents
- General Information About Minecraft on a Chromebook
- Enabling Developer Mode
- Installing Minecraft on Chromebook
- Running the Game
- Playing Minecraft on a Chromebook with Low Specs
- Enhancing Performance on Chrome OS
General Information About Minecraft on a Chromebook
For smooth gameplay, your Chromebook needs these minimum specs:
- System Architecture: 64-bit (x86_64, arm64-v8a)
- Processor: AMD A4-9120C, Intel Celeron N4000, Intel 3865U, Intel i3-7130U, Intel m3-8100Y, Mediatek Kompanio 500 (MT8183), Qualcomm SC7180, or better.
- RAM: 4 GB
- Storage: At least 1 GB of free space
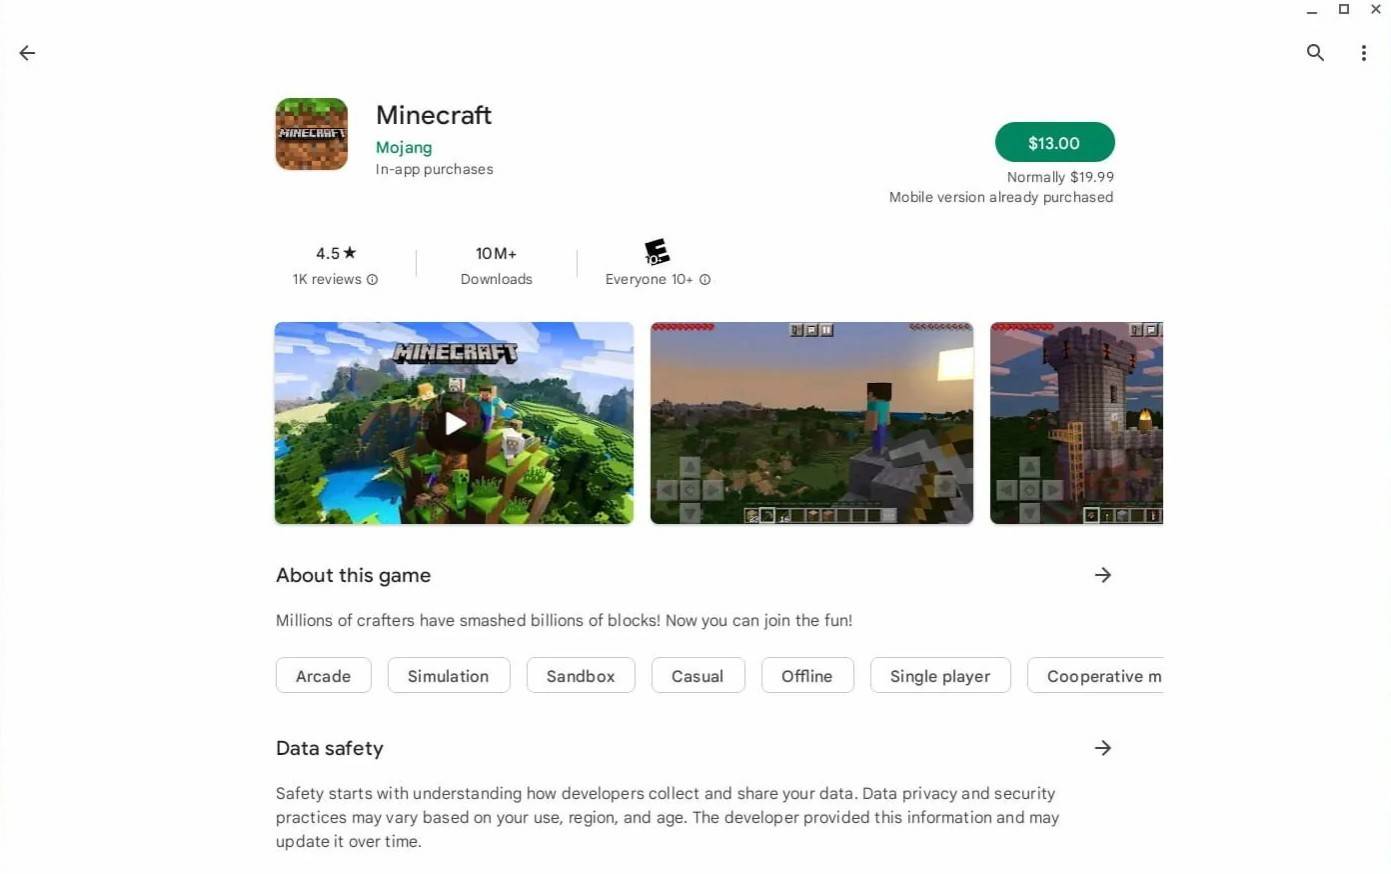
These are minimum requirements. If you experience stuttering, see our performance tips at the end. Let's get to installation! The easiest way is via the Google Play Store. Simply search for Minecraft: Bedrock Edition, and purchase it for $20 (or $13 if you already own the Android version). This method is quick and convenient.
However, if you prefer a different version, Chrome OS's Linux foundation allows for other Minecraft installations. This method requires more technical steps, detailed below.
Enabling Developer Mode
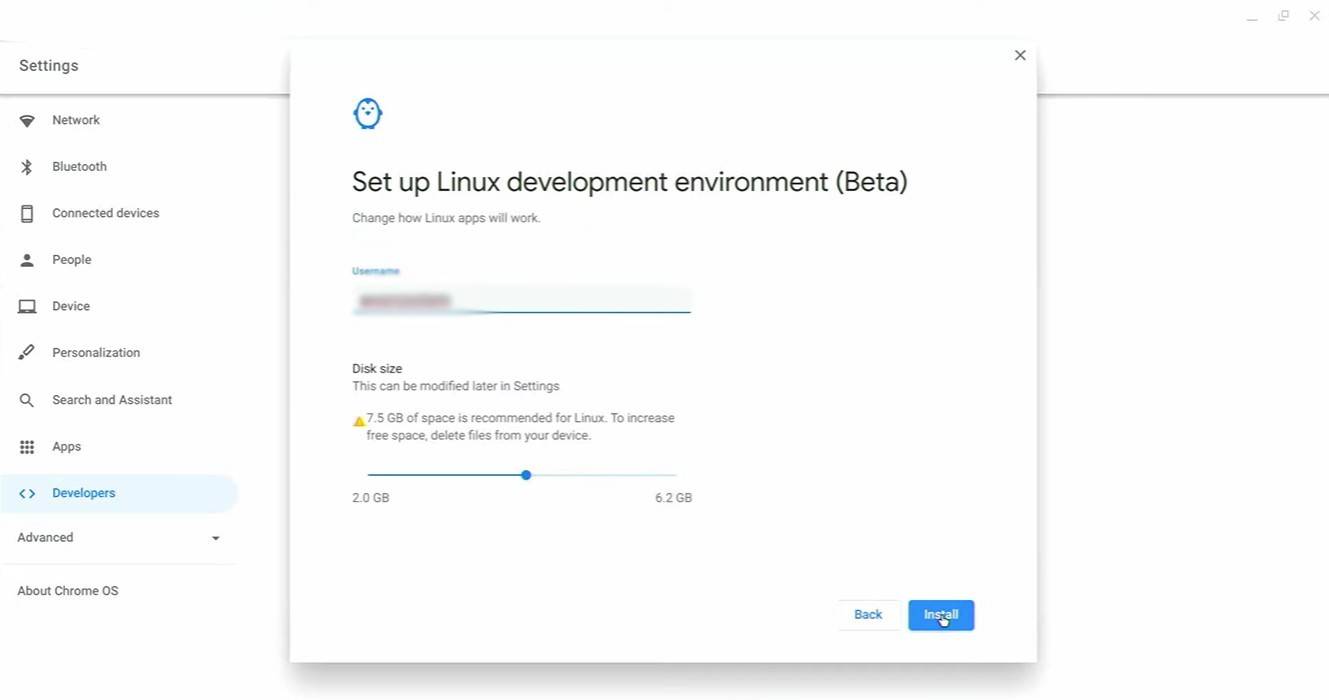
First, enable Developer Mode. Access your Chromebook's settings (usually through a Start menu equivalent), find the "Developers" section, and enable the "Linux development environment." Follow the on-screen instructions. Once complete, the Terminal (similar to a Windows command prompt) will open—this is where the next steps take place.
Installing Minecraft on Chromebook
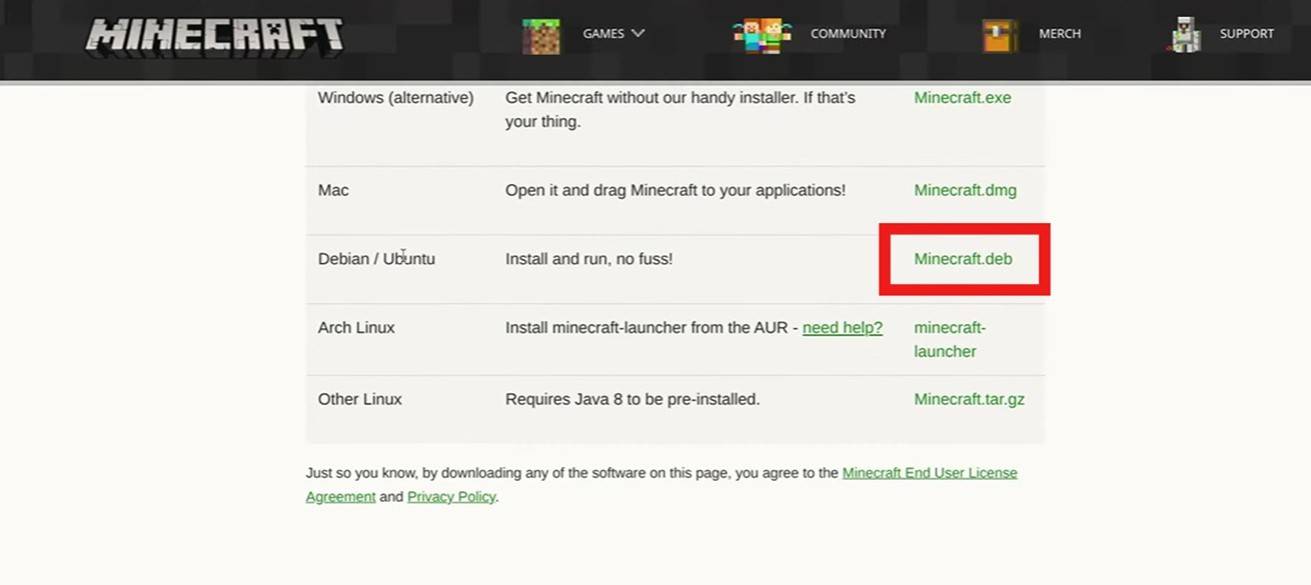
[Further installation instructions would go here]
Latest Articles
Trending Games


![Taffy Tales [v1.07.3a]](https://imgs.anofc.com/uploads/32/1719554710667e529623764.jpg)


Top News


Latest Games