How To Enable SSH On The Steam Deck
This guide explains how to enable and use SSH on your Steam Deck for remote access to your files. The Steam Deck's desktop mode opens up possibilities beyond gaming, allowing remote file access via SSH.
Enabling SSH on Your Steam Deck
 Follow these steps to enable SSH:
- Power on your Steam Deck.
- Access the Steam menu (Steam button).
- Navigate to
Settings > System > System Settings > Enable Developer Mode. - Return to the Steam menu.
- Select
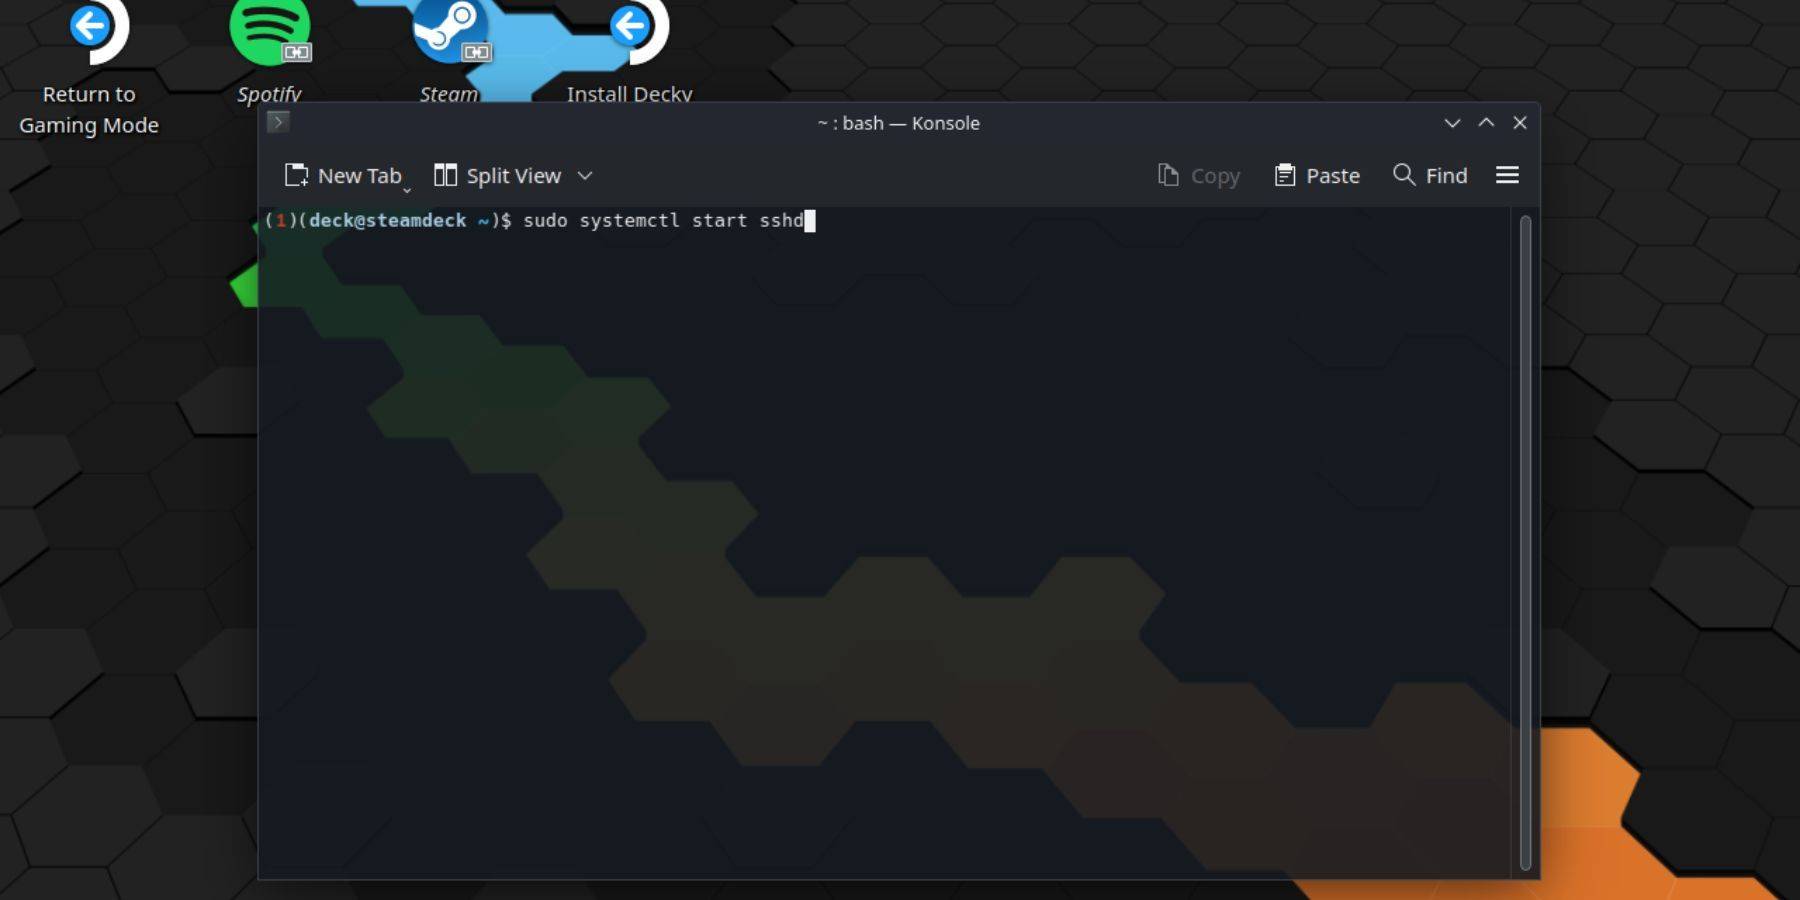
Power > Switch to Desktop Mode. - Open Konsole from the Start menu.
- Set a password (if you haven't already) using the command:
passwd. Create a strong password. - Enable SSH using:
sudo systemctl start sshd. - To ensure SSH starts automatically after a reboot, use:
sudo systemctl enable sshd. - You can now access your Steam Deck remotely using a third-party SSH client.
Important: Avoid modifying or deleting system files to prevent OS corruption.
Disabling SSH on Your Steam Deck
To disable SSH:
- Open Konsole from the Start menu.
- Use
sudo systemctl disable sshdto prevent SSH from starting on reboot. Usesudo systemctl stop sshdto immediately stop the SSH service.
Connecting to Your Steam Deck via SSH
 After enabling SSH, use a third-party application like Warpinator for easy file transfer. Install Warpinator on both your Steam Deck and your PC, then launch it on both devices simultaneously for simple drag-and-drop file transfers.
Alternatively, if you're using a Linux PC, you can connect directly through your file manager. Enter sftp://deck@steamdeck in the address bar and provide the password you set earlier.

Latest Articles
Trending Games


![Taffy Tales [v1.07.3a]](https://imgs.anofc.com/uploads/32/1719554710667e529623764.jpg)


Top News


Latest Games